Composition Task Description:
For this composition task, you are going to compose a piece of music for a solo instrument of your choice. Your main focus through this composition is using extended techniques your instrument is capable of, as well as using its full pitch range.
Task 1 – The Basics:
Step 1: What you are going to do first is watch some of these videos. Look at the many different extended techniques that can be used by many different instruments.
Flute extended techniques: https://www.youtube.com/watch?v=9cGJ-Y1EviI
Violin extended techniques: https://www.youtube.com/watch?v=jfdTnFI4j_Q
Guitar extended techniques: https://www.youtube.com/watch?v=gT93WzVJY54
Saxophone extended techniques: https://www.youtube.com/watch?v=WobnM7f8dNc
Cello extended techniques: https://www.youtube.com/watch?v=bGZPUJWRkLI
Step 2: The next thing you are going to do is choose what instrument you want to compose for. It can be your own instrument or one that you don’t play, however you need to be able to access it (you’ll see why later on).
Step 3: Choose the tonality you want your composition to be in – it can be in major, minor, or both!
Step 4: Choose the key you want your composition to be in. You don’t have to strictly stick to this throughout your composition – feel free to experiment with different keys later on – but you need somewhere to start.
Task 2 – Improvisation:
Your next step is making music!
Step 1: Improvise on the instrument you have chosen to find what extended techniques you can use in your composition. (This is why you need access to the instrument.)
Step 2: Record these techniques somewhere – you can either write them down or record yourself playing them. Doing both of these things may be helpful.
Step 3: If you are struggling to find any techniques you can use or that you like, do some research on your instrument of choice.
Even though the main focus of your composition is the extended techniques, it’s should still be musical! So that leads you to the next step…
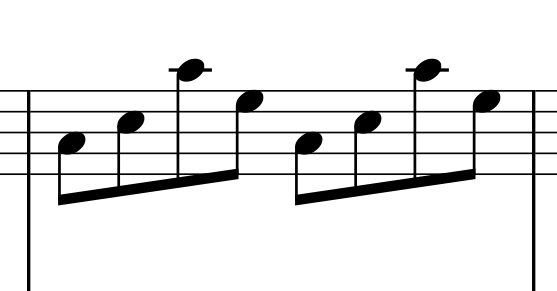
Step 4: Improvise with notes to find a melody or motif that you like! Here’s an example of a motif that I created:
Task 3 – Play Around:
It’s now time to turn your ideas into a structured composition!
Step 1: Give your piece structure, include the motifs and the melody/melodies you created, and figure out how to include the extended techniques you have picked in your composition.
Task 4 – Make It Last:
When it comes to writing your composition down, there are multiple options that you can choose from. You can hand write it, or use notation software.
Step 1: Figure out how you are going to notate your composition. If you want to use notation software, an example of an online site you can use is Noteflight (there are more – don’t think this is the only option!). If you have other notation software downloaded – for example, Finale or Sibelius – on your device, or if you can access them somewhere else, feel free to use them!
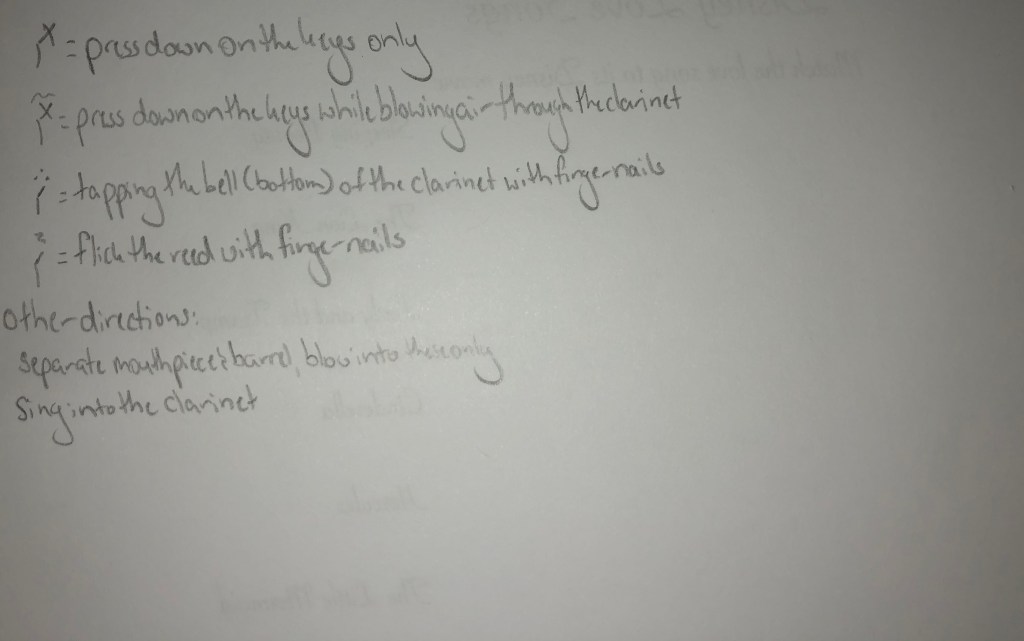
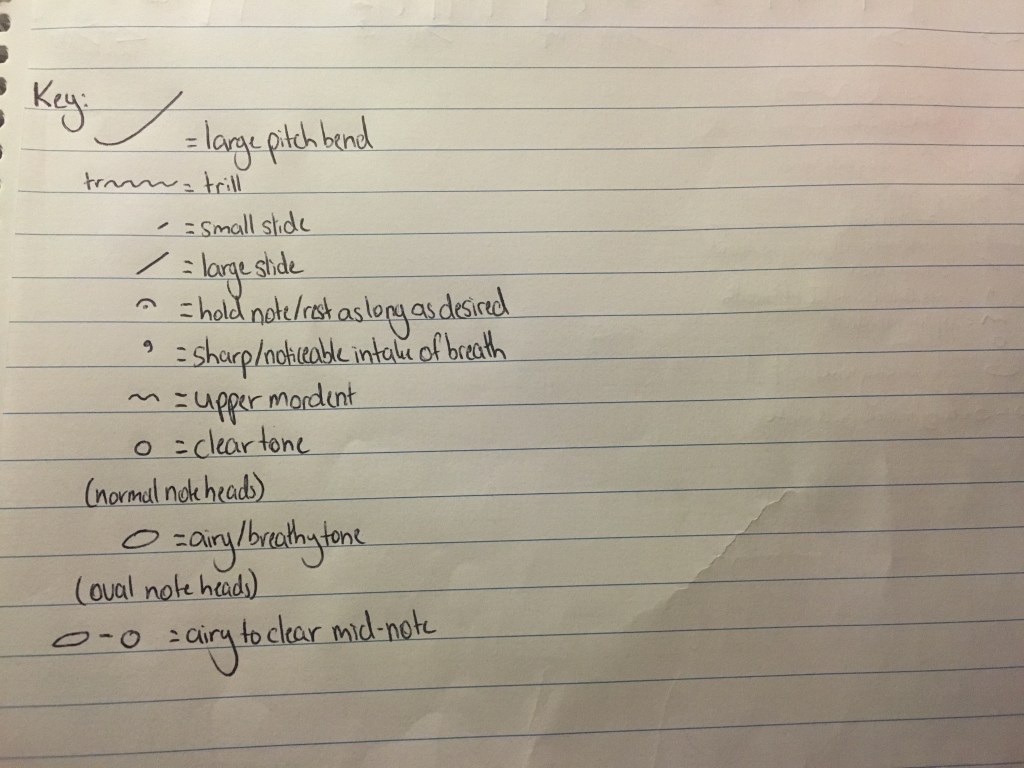
Step 2: Make sure you are clear in your notation. If you need to have a key that explains what certain things mean, include this. Here are two examples of different keys:
Now it’s time to share your creation with the class! Congratulations!
Reflection
After hearing James Humberstone’s composition Fantasia 2, and re-watching the videos we recorded of a performance of it in class, I was inspired to use extended techniques in my composition, and therefore use it in the “baby steps” assessment. Seeing the way the performer occasionally played the piano with her fists was the main inspiration. I thought it would be interesting to focus on composing a piece for one instrument, making extended techniques a major part of the composition. I wanted to use the recording we made in that class in this assessment, but I unfortunately did not know how to upload the video to the blog (I was told the file could not be uploaded).
I decided to add the four main tasks to break up the baby steps a little bit. Having four tasks is much less daunting for students than having all of the steps one after the other (eleven in total). My baby steps changed a few times – I originally started with choosing the tonality of the piece. Since I decided to focus on one instrument, I decided the first baby step should be for the students to pick what instrument that want to compose for. I then went from there with the rest of the steps. Before the students write down any of their composition, they are instructed to improvise with the instrument they have chosen, discovering extended techniques, and then to improvise further, creating melodic ideas and different motifs. The last step is for them to write down their composition in a way that best suits their needs – they can use notation software or hand write it.
References:
Cello Sounds Today. (2017, January 23). Cello Solos Today: New Sounds [Video File]. Retrieved from https://www.youtube.com/watch?v=bGZPUJWRkLI
Ensemble Musikfabrik. (2011, June 20). Helen Bledsoe|AIR & PERCUSSIVE SOUNDS FOR THE FLUTE|Ensemble Musikfabrik [Video File]. Retrieved from https://www.youtube.com/watch?v=9cGJ-Y1EviI
Jazz at Lincoln Center’s JAZZ ACADEMY. (2016, October 18). Extended Techniques on the Saxophone [Video File]. Retrieved from https://www.youtube.com/watch?v=WobnM7f8dNc
Robert Lunn. (2015, March 4). Extended Techniques for the Guitar (#2, The Right Hand) [Video File]. Retrieved from https://www.youtube.com/watch?v=gT93WzVJY54
TwoSetViolin. (2018, December 21). All Contemporary Violin Techniques Ranked by how I N T E R E S T I N G they are [Video File]. Retrieved from https://www.youtube.com/watch?v=jfdTnFI4j_Q
